
Prompt starter
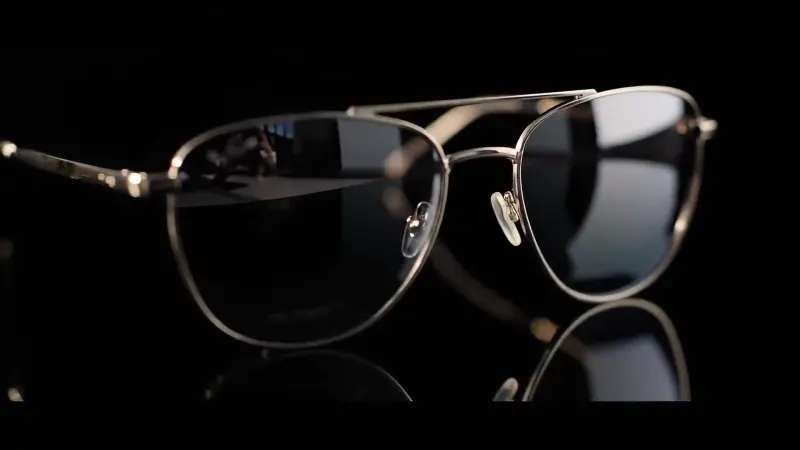
Titanium eyewear study
Prompt
A premium pair of brushed titanium sunglasses on a glossy black surface, dramatic rim light, crisp product photography, deep shadows, 16:9.
Upload up to 16 reference images, describe the transformation, and restyle, combine or recreate the shot with GPT Image 2, Nano Banana Pro, Seedream 5.0 Pro and more, in up to 4K.
GPT Image 2
OpenAI gpt-image-2 — text to image, multi-reference editing and mask inpainting, up to 4K.
Prompt starter
Prompt
A premium pair of brushed titanium sunglasses on a glossy black surface, dramatic rim light, crisp product photography, deep shadows, 16:9.
Image to image AI · Online generator
An image to image generator starts from visual evidence instead of asking a model to invent every detail from text. Upload a photo, illustration, sketch, product shot or previous AI result; explain what should change and what should remain recognizable; then GPT Image 2 creates a new image informed by those references. This makes the workflow useful when consistency matters more than surprise.
TryH3 accepts up to 16 reference images in one image-to-image request, with JPEG, PNG and WebP uploads up to 20 MB each. References can contribute a subject, material, palette, composition or style, while the prompt assigns a clear role to each one. You can then choose from 15 fixed aspect ratios plus Auto and render at 1K, 2K or 4K. The tool, results and supporting guide all live on this page, so iteration stays in one browser workspace.
The best image-to-image prompts divide responsibilities between the upload and the written direction. Let each reference show the model something that would be tedious to describe, then use the prompt to explain the intended transformation. Three steps are enough for a controlled first result.
Choose clean files where the subject or style you want to preserve is easy to see. One strong reference is often better than several nearly identical images. When combining sources, use each file for a distinct purpose—for example, one for the product, one for the room and one for the color palette.
Write a direct instruction such as “keep the bottle shape and label layout, replace the studio background with a sunlit kitchen, and use warm editorial photography.” Naming protected details reduces ambiguity. Naming the desired change gives the model a job beyond simply copying the upload.
Select the final aspect ratio before generating so the model composes for the real canvas rather than forcing a crop later. Use 1K for quick exploration and raise the output to 2K or 4K after the subject, framing and style are working. Review small identity details before publishing.
Image-to-image generation is most valuable when an existing visual is almost useful but not yet right for the job. The reference creates continuity; the prompt opens a controlled path to a new scene, treatment or combination.
Convert a sketch into a polished render, reinterpret a photo as an editorial illustration, or explore a new material and lighting treatment. State which shapes and identity cues must survive the style change.
Place the same product in a different environment, explore wardrobe or color options, or develop a character across several scenes. Reuse the same clear reference when continuity is more important than novelty.
Use separate uploads for subject, environment, composition and palette, then explain their roles in the prompt. This is more controllable than asking the model to guess which parts of several images deserve priority.
Most disappointing results come from unclear priorities. The model can see every uploaded image, but it cannot know which feature you value unless the prompt says so. Use these checks before adding more references or making the instruction longer.
Crop around the useful information. A tightly framed product or face sends a cleaner identity signal than a distant subject surrounded by unrelated background details.
Give every reference one job. Explain “use image one for the person and image two for the lighting.” Without roles, multiple inputs can compete and produce an average of everything.
Protect identity with concrete language. Name the features that must remain unchanged: face, silhouette, logo placement, packaging proportions, garment details or a specific color relationship.
Align source and destination framing. A square close-up transformed into a wide banner requires the model to invent both sides. Provide a wider reference or explicitly describe what should fill that new space.
Use inpainting for a small local edit. If only one object or region needs to change, the dedicated inpainting tool gives a mask that protects the rest of the image more directly than a full-frame transformation.
The best image to image generator is not the one that changes the picture most dramatically. It should follow the transformation, preserve the requested identity cues and give you enough control over references, canvas shape and resolution to reach a repeatable result. A clear cost before generation, durable result storage and useful failure handling matter too because image work usually takes more than one attempt.
TryH3 is built around that iterative workflow. It supports multi-reference direction instead of a single opaque strength slider, offers practical web and print-oriented canvas ratios, and keeps text-to-image, image-to-image and inpainting close together. Start with the simplest instruction that proves the idea, inspect what drifted, then add one preservation rule or reference only where it solves a visible problem.
A reference-based transformation can begin or end a larger workflow. Create a missing source with text to image, correct one region through inpainting, or carry the finished frame back to TryH3’s MiniMax H3 video generator when the concept needs motion. Direct internal links make each next step available without turning one overloaded tool into every workflow at once.